Title here
Summary here
Apr 24, 2025 · 13 min read

Interactive EF Core migrations are migrations that run C# logic during deployment instead of relying only on static SQL scripts. This pattern lets you reuse tested application helpers, handle edge cases, and keep schema updates plus data changes in a single migration flow.
Use this process when your migration includes data transformations that are hard to express in pure SQL:
IMigrationsAssembly: Register a custom migrations assembly so EF Core can instantiate migrations with constructor parameters.DbContext into the migration: Read connection details from the live context that EF Core uses during migration execution.migrationBuilder.Sql: Keep writes inside EF Core’s migration transaction so schema and data changes stay atomic.EF Core is Microsoft’s code-first ORM for .NET, designed to bridge your C# domain model and the underlying database. Traditionally, keeping your C# classes and hand-written SQL (T-SQL, PL/pgSQL, etc.) in sync is a constant headache – every schema change requires parallel updates in two languages. EF Core migrations solve this by letting you:
Out of the box, migrations handle most schema changes automatically. You can also switch to custom configuration or raw SQL when you need more precise control. By default, all of this still happens in static SQL scripts rather than executable .NET code.
When you run a command like:
dotnet ef migrations add AddUserPhoneNumberFieldEF Core needs to figure out exactly what changed in your model so it can generate the right operations (for example, AddColumn("PhoneNumber")). Under the hood, it follows these steps:
DbContext and the entity types it references to construct an in-memory representation of your model. It inspects each CLR class, its properties, keys, relationships, annotations, and fluent-API configurations. Then it builds a snapshot with internal syntax like Entity = User, ColumnName = Age, type = int, DefaultValue = 0, Required = false and repeats this operation for all fields of all entities.<YourContext>ModelSnapshot.cs). This snapshot captures the state of your model at the point of the last migration: which tables existed, what columns they had, their types, defaults, constraints, and so on.User.PhoneNumber is new, or that Order.DateCreated changed its default value.Up() and Down() methods containing the corresponding calls to the migration builder API.Although EF Core will scaffold most schema changes for you, there are several scenarios where you still need to drop down to raw SQL, like complex data transformations. When you need to reshape or backfill existing data – for example, splitting a column into two, aggregating values from multiple rows, or populating lookup tables – there’s no built-in EF API. A custom migrationBuilder.Sql("...") lets you write exactly the UPDATE/INSERT/DELETE logic you need.
Here’s a concrete example of using raw SQL for splitting an existing FullName column into separate FirstName and LastName columns:
// 1. Add new columns
migrationBuilder.AddColumn<string>(
    name: "FirstName",
    table: "Users",
    type: "nvarchar(100)",
    nullable: true);
migrationBuilder.AddColumn<string>(
    name: "LastName",
    table: "Users",
    type: "nvarchar(100)",
    nullable: true);
// 2. Populate them by splitting FullName on the first space
migrationBuilder.Sql(@"
    UPDATE Users
    SET
        FirstName = LEFT(FullName, CHARINDEX(' ', FullName + ' ') - 1),
        LastName = LTRIM(SUBSTRING(FullName, CHARINDEX(' ', FullName + ' '), LEN(FullName)))
");
// 3. Remove the old column once data is migrated
migrationBuilder.DropColumn(
    name: "FullName",
    table: "Users");
What’s happening here?
AddColumn calls create the new schema.migrationBuilder.Sql(...) runs a custom UPDATE that parses and copies data from FullName into the new columns.DropColumn removes the obsolete FullName.Relying exclusively on raw SQL in your EF Core migrations may work for straightforward schema tweaks, but it quickly shows its cracks when real business logic enters the picture. Imagine you need to apply a nuanced data transformation – perhaps calling into your domain validation library, reusing a helper function to enrich your records before saving them back. Translating all of that into plain SQL not only duplicates effort, but it is often not even possible without resorting to complex, hard-to-maintain scripts.
Beyond maintainability, testability suffers as well. While you can write unit tests against your C# services and helpers, verifying a multi-statement SQL block demands spinning up a real database, seeding it with data, and manually stepping through the script. This friction slows down development, undercuts confidence in your migrations, and raises the risk of data loss or corruption when you finally deploy.
In many systems, it’s common to store lists of tags as comma-separated strings in a single column. For example, your existing Items table might have:
TagsCsv VARCHAR(MAX) -- e.g. 'red,large,featured'To modernize your schema and take advantage of JSON querying and indexing, you add a new TagsJson column:
migrationBuilder.AddColumn<string>(
    name: "TagsJson",
    table: "Items",
    type: "nvarchar(max)",
    nullable: true);
You now need to backfill TagsJson by parsing each TagsCsv value into a JSON array.
STRING_SPLIT and FOR JSON PATH, but that’s unavailable or behaves differently on PostgreSQL or MySQL.UPDATE Items
SET TagsJson = (
SELECT value
FROM STRING_SPLIT(TagsCsv, ',')
FOR JSON PATH
);"hard,cover") or extra spaces (" red ")? Hand-rolling a splitter in SQL quickly becomes a tangle of nested SUBSTRING and CHARINDEX calls – hard to maintain.DataHelpers.ParseCsv method that already handles quoted values, trimming, and empty tokens.Let’s say we have enhanced the Customer table by adding Latitude and Longitude columns alongside the existing free-form Address field. To unlock map views and spatial queries, you need to backfill every customer with real geographic coordinates based on their address.
migrationBuilder.AddColumn<decimal>(
    name: "Latitude",
    table: "Customer",
    nullable: true);
migrationBuilder.AddColumn<decimal>(
    name: "Longitude",
    table: "Customer",
nullable: true);Attempting this in pure SQL runs into multiple roadblocks:
EF Core’s migration pipeline uses its own internal service provider (dependency injection container) to discover and instantiate migration classes. By default, the IMigrationsAssembly implementation simply scans for types that inherit from Migration and calls:
Activator.CreateInstance(migrationType);Because no IServiceProvider is involved, any constructor parameters in your migration classes cause errors – migrations are always created via a parameterless constructor. To enable DI support in migrations, you need to replace that default behavior with one that resolves migrations with the help of DI.
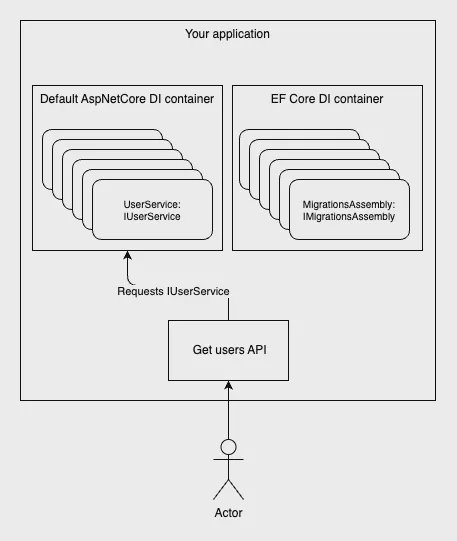
EF Core DI container.
By default, EF Core’s internal service provider registers a built-in MigrationsAssembly that calls Activator.CreateInstance with no arguments, making it impossible to inject anything into your migration classes. Fortunately, you can override that registration in DbContext inside OnConfiguring.
Below is a sample ContextAwareMigrationsAssembly implementation. It pulls the live DbContext from EF Core’s internals, extracts the existing connection string, and passes it into each migration’s constructor. Because most migrations only need that connection string (and whatever helpers you inject alongside it), this simple override unlocks full DI support in your migrations.
/// <summary>
/// MigrationsAssembly that provides DbContext to migrations if they have a constructor with a DbContext parameter.
/// </summary>
[System.Diagnostics.CodeAnalysis.SuppressMessage("Usage", "EF1001:Internal EF Core API usage.", Justification = "This function is needed to create ContextAwareMigrations")]
public class ContextAwareMigrationsAssembly : MigrationsAssembly
{
    private readonly DbContext _context;
    public ContextAwareMigrationsAssembly(
        ICurrentDbContext currentContext,
        IDbContextOptions options,
        IMigrationsIdGenerator idGenerator,
        IDiagnosticsLogger<DbLoggerCategory.Migrations> logger)
        : base(currentContext, options, idGenerator, logger)
    {
        _context = currentContext.Context;
    }

    public override Migration CreateMigration(TypeInfo migrationClass, string activeProvider)
    {
        var hasCtorWithDbContext = migrationClass.GetConstructor([typeof(DbContext)]) != null;
        if (!hasCtorWithDbContext)
        {
            return base.CreateMigration(migrationClass, activeProvider);
        }

        var instance = (Migration)Activator.CreateInstance(migrationClass.AsType(), _context)!;
        instance.ActiveProvider = activeProvider;
        return instance;
    }
}
How it works:
MigrationsAssembly, we tap into EF Core’s internal migration discovery and execution logic. We suppress the EF1001 warning because we intentionally rely on an internal API for advanced scenarios.ICurrentDbContext, from which we extract the actual DbContext instance EF Core is using. This gives us a ready-to-use context (and its connection string, configuration, and so on) for any migration that needs it.CreateMigration, we reflect on the migration type to see if it defines a constructor accepting a DbContext. If it doesn’t, we delegate to the base behavior (Activator.CreateInstance with no arguments). If it does, we call Activator.CreateInstance, passing in our captured _context, so that EF Core will inject it into the migration.With this override in place, any migration class that declares a public MyMigration(DbContext context) constructor will receive your live DbContext automatically.
Then you can register this override in your DbContext:
public class AppDbContext : DbContext
{
    // ...
    protected override void OnConfiguring(DbContextOptionsBuilder optionsBuilder)
    {
        optionsBuilder.ReplaceService<IMigrationsAssembly, ContextAwareMigrationsAssembly>();
    }
}Even with a custom MigrationsAssembly in place that allows you to inject a live DbContext, using EF Core’s context directly inside a migration can introduce subtle lifecycle and concurrency issues. Migrations execute within their own transaction scope, and enlisting an EF Core DbContext in that flow may conflict with internal change-tracking, leading to unexpected locks or deadlocks. Furthermore, because EF Core’s service provider is isolated during migrations, any configuration, logging, or interceptors you rely on in your main application container might not be applied, and the overhead of instantiating entities purely for data backfills can degrade performance.
To sidestep these concerns, it’s often cleaner to bypass EF Core entirely for one-off data transformations and lean on a micro-ORM like Dapper. Dapper sits directly on top of ADO.NET and lets you map query results to plain POCOs, bind parameters safely, and execute both queries and commands without the weight of EF’s change tracker or internal services.
Here is an example:
public partial class ConvertCsvTagsToJson : Migration
{
    private readonly string _connectionString;
    // Capture the connection string via the injected DbContext
    public ConvertCsvTagsToJson(DbContext context)
    {
        _connectionString = context.Database.GetConnectionString();
    }

    protected override void Up(MigrationBuilder migrationBuilder)
    {
        // Open a lightweight ADO.NET connection for reading
        using var connection = new SqlConnection(_connectionString);

        // Dapper maps each row to our record type without EF change-tracking
        var records = connection.Query<RecordData>(
            "SELECT Id, CsvTags FROM Records");

        // For each record, convert CSV to JSON using our helper,
        // then emit a raw SQL update so EF Core handles the write
        foreach (var record in records)
        {
            var json = CsvToJsonParser.Parse(record.CsvTags);
            migrationBuilder.Sql($@"
                UPDATE Records
                SET CsvJson = '{json.Replace("'", "''")}'
                WHERE Id = {record.Id};
            ");
        }
    }

    // Simple record type for Dapper to populate
    private record RecordData(int Id, string CsvTags);
}
This pattern uses Dapper exclusively to read legacy data, then hands it back to EF Core’s migration pipeline for updates. By reading with Dapper, you avoid the change-tracker overhead and any DI or transaction issues that come from using a full DbContext inside a migration class. At the same time, all writes go through migrationBuilder.Sql(...), ensuring they participate cleanly in the same transaction and provider-agnostic execution that EF Core expects.
Key points of this approach:
SqlConnection and use connection.Query<RecordData> to fetch Id and CsvTags. There’s no EF change-tracking or transaction inflation.CsvToJsonParser.Parse encapsulates all the string-splitting and JSON serialization logic, so the migration remains concise and easy to maintain.migrationBuilder.Sql, each UPDATE is executed inside the same migration transaction and respects the configured provider, ensuring that schema and data changes remain atomic and portable.public ConvertCsvTagsToJson(DbContext context) constructor. Thanks to ContextAwareMigrationsAssembly, EF Core will resolve this with the live DbContext and supply its connection string.This hybrid approach gives you the best of both worlds: Dapper’s lightweight, change-tracker-free querying to pull legacy data out, and EF Core’s reliable, transactional execution via migrationBuilder.Sql to write the results back. By injecting just the connection string into your migration, you avoid the complexity of managing a full DbContext inside EF’s internal pipeline, while still reusing your well-tested C# parsing helpers.
While this pattern is powerful, use it judiciously. Migrations run directly against your production database during deployment, inside a single transaction scope, and must complete quickly to avoid locking tables or hitting timeout limits. Heavy or long-running backfills can hold schema locks and delay application startup. If you need to transform large volumes of data, consider splitting the work into smaller batches, using maintenance windows, or moving the heaviest operations into a dedicated data-migration job outside of the EF Core pipeline. With careful planning, however, extending EF Core migrations in this way unlocks robust, maintainable, and type-safe data transformations that static SQL alone simply can’t achieve.
DbContext directly inside Up()?You can, but it is usually not the best option for heavy data backfills. Migrations run in a sensitive deployment path, and full EF Core change tracking can add overhead and increase lock duration. For bulk reads, Dapper plus focused SQL updates is often simpler and safer.
You can, but writing through migrationBuilder.Sql keeps execution aligned with EF Core’s migration transaction semantics and provider pipeline. That reduces surprises during deployment and rollback handling.
It can be, but only if you batch carefully. Large, single-shot updates can hold locks for too long and cause timeouts. For very large datasets, run phased backfills or move the heavy work into an out-of-band data migration process.
Use plain migrations when changes are mostly schema operations or simple SQL updates. Reach for DI plus Dapper when transformations involve reusable business logic, parsing edge cases, or complex conditional rules.